DESIGN & PRODUCTION.
LOGO DESIGN:
I first began with this logo i had made a lot of sketches and thumbnails so it was just a case of getting them into illustrator so i could see what they looked like.
These A's are to represent Apex and a tapas stand.


Although i felt they were a little pale and i didn't feel although they were working that well.


FURTHER DESIGN BRANDING:
After some research i decided i would try and get a flower shape to represent day of the dead and try and tie that in with my design to see what it looked like.
I went on youtube to find a tutorial to achieve the flower pattern that i wanted.

I tired different variations-


I prefer this one the most:


I began playing about with my restaurant name and putting flowers with the text.

The most obvious infographic i wanted to achieve was this skull so i put a flower in the eye instead of just a dot so i could achieve both of things i wanted in one vector.

Different variations:


Possible menu branding:


I added a bar in my letter A to create the tapas stand.


Through my research i found this Mexican image on designspriation and a felt it would be appropriate to mock up my logo inside of that as i was doing a Mexican restaurant that i would need a house shape with a point to really strengthen my concept of apex to go with the restaurant aesthetics.

I tired a different stroke to see what feel i would get.

I preferd the straight line i felt it was more geometric and was more appropriate for my design.

Variations:
I tried my letter in the yellow and i don't feel it works.


I applied Haymaker typeface to my first menu which consisted of cocktails and wines. I wanted to split my content up so i put a black line through in the center.


Next to keep with my colour scheme i added some green dots under the line this also adds to my sugar skull theme.


After finessing my menu i decided it might be more beneficial to my concept (apex - highest point) to try using triangles instead of circles. I then tried them up side down and in alternate order so some were up and some were down.

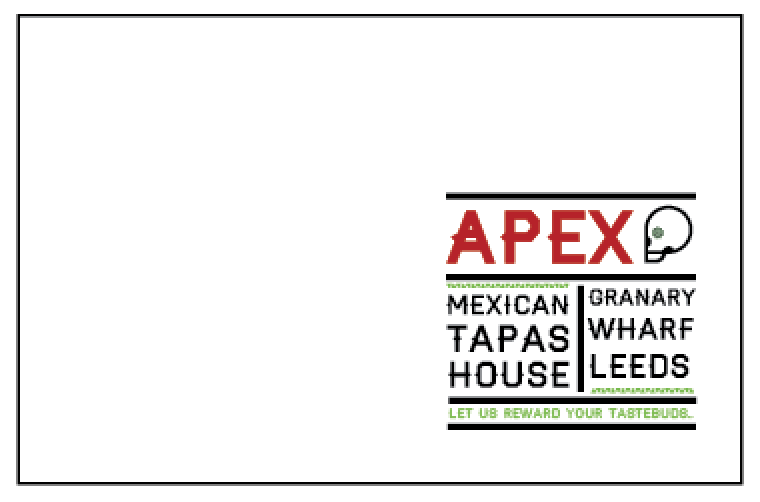
Final logo:

I changed the dots on my branding to triangles aswel:


Menu 2
Menu 2 had a similar style using the black line again to chop the top section from the bottom, This menu was souly for tequila.


Menu 3 is my tapas menu . This menu adds to my concept about day of the dead as the food i serve at my restaurant is food they serve at day of the dead offering.


For the last menu i added in more food than the other one because this menu features snacks and dips also sides.


For my poster i added my branding and changed the location from trinity to granary wharf. I didn't want my restaurant to be to commercial.


Coaster:
I didn't want to create a table mat because not many restaurants I've recently been to have table mats anymore so i decided i would make a coaster that would be used at the bar. Which is simply my logo.

Pattern Design:
I wanted to make food wrapping so i decided to make a repeat pattern using one of the first flowers i had designed the same flower used from the skull and the skull i didn't want to over crowd the pattern with to many shapes.

I made the pattern on illustrator:


Flags:
I decided to make small flags putting the hotness of the food on them, i printed a few different sizes and made prototypes before i printed my final piece.

I shared out two pages of 8 to use for my business cards & loyalty cards.

Front:


Front:


No comments:
Post a Comment